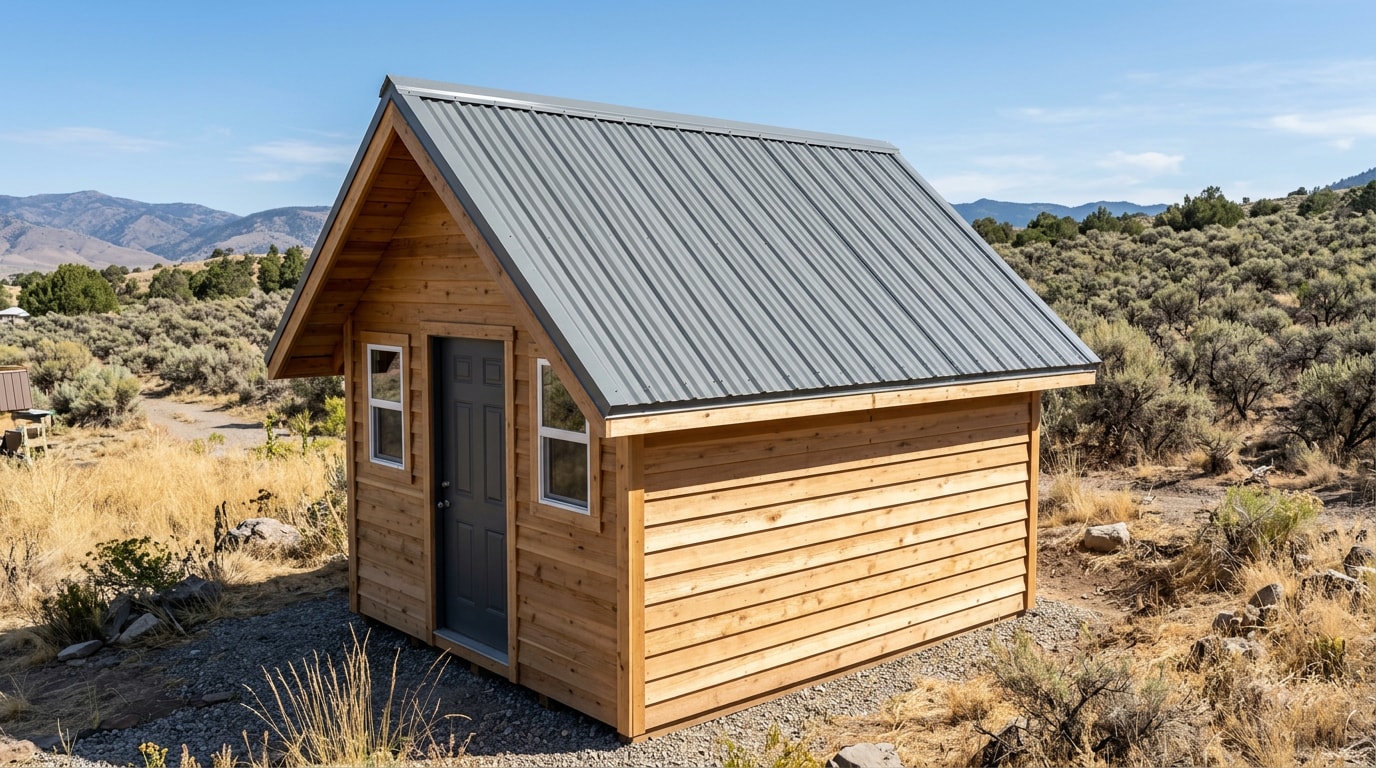
Installing metal roofing on a shed in Twin Falls, ID protects an outbuilding from hot summers, heavy snow, and sudden Magic Valley windstorms better than asphalt shingles ever will. Done right, a metal roof can outlast shingles by decades. This guide covers every step, plus the local permit and climate details most how-to articles skip entirely.
Twin Falls Climate and Permit Considerations Before You Start
Twin Falls sheds face wide temperature swings, flash wind events off the Snake River Canyon, and winter snow loads that linger on shaded north-facing slopes. Those conditions are exactly why exposed-fastener panels, proper underlayment, and correct slope matter more here than in milder climates.
Permitting is simpler than most homeowners expect. Any shed or accessory building greater than 200 square feet requires a building permit in Twin Falls, while a shed under 200 square feet is generally allowed without one, though it still needs to meet Planning and Zoning regulations. Re-roofing an existing, legally built shed with the same footprint typically doesn't trigger a new permit, but confirm your specific lot and zoning district before starting. The Twin Falls service area page has more on local conditions we see most often on job sites here.
Tools and Materials Checklist for a Shed Metal Roof
Lay out everything before the first screw goes in. A mid-project hardware run on a 95-degree August afternoon is the easiest way to lose momentum.
Tools needed:
- Tin snips or a circular saw with a metal-cutting blade
- Cordless drill with a magnetic screw-tip
- Chalk line and tape measure
- Sturdy ladder
- Work gloves and cut-resistant safety glasses
Metal roofing materials:
| Material | Purpose |
|---|---|
| Metal panels | Primary roof covering |
| Ridge cap | Seals and finishes the roof peak |
| Gable and rake trim | Protects panel edges on the sides |
| Eave and drip edge trim | Directs water off the roof edge |
| Foam closure strips | Blocks pests and weather at gaps |
| Synthetic underlayment | Moisture barrier beneath panels |
| Roofing screws with rubber washers | Fastens panels without leaking |
| Butyl seam tape | Seals panel overlaps |
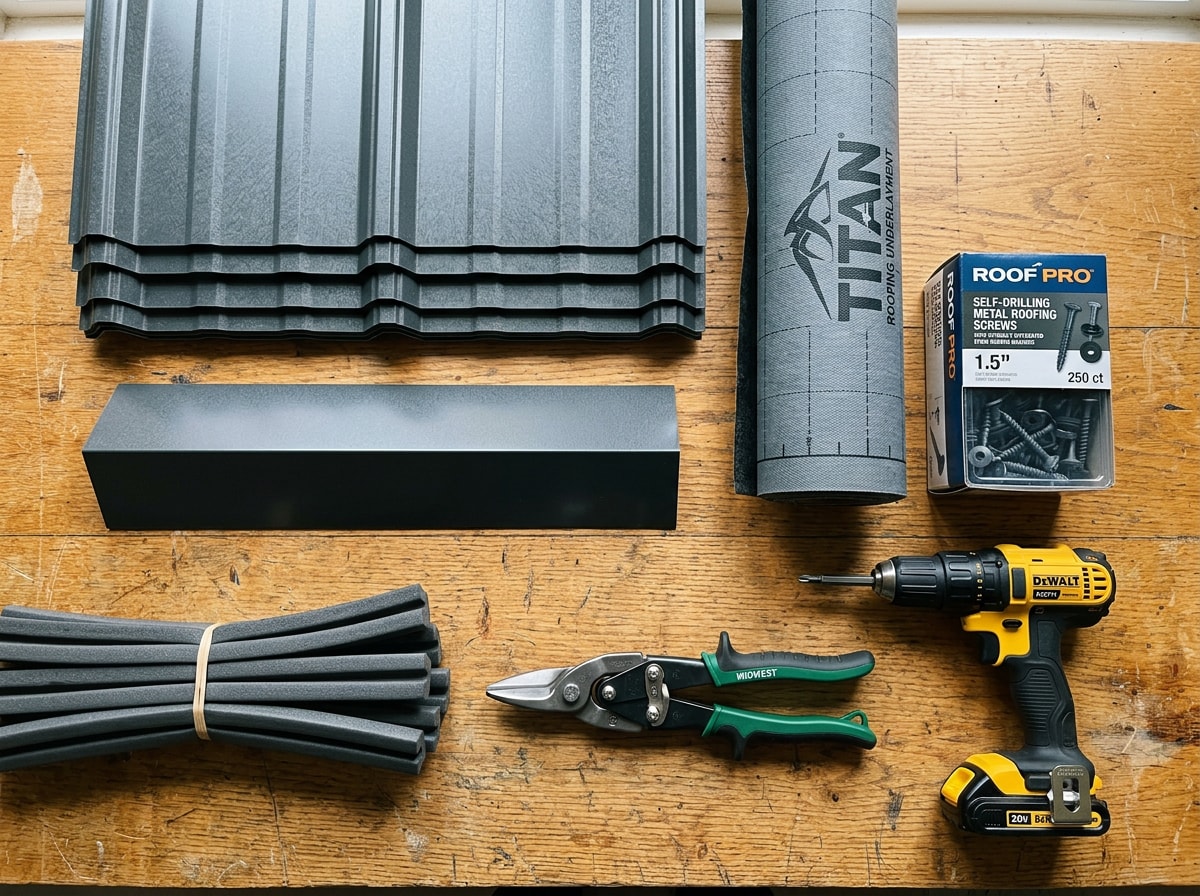
Panel gauge and profile availability varies by supplier, so it's worth confirming stock before you commit to a plan. If you'd rather have a crew source and install the panels for you, our roof installation team handles that sourcing as part of the job.
Shed Layout and Prep
Two things need confirming before any tools touch the roof: which panel type fits the shed, and whether the existing frame can support metal roofing. Skipping this step is how DIY roofs end up with sagging panels or voided warranties.
Select the Right Panels
Shed roofs typically use one of three profiles: corrugated, ribbed, or standing seam. Corrugated and ribbed panels are the most common pick for small outbuildings. They're affordable, and their exposed fasteners are straightforward for a DIYer to install.
Standing seam costs more and hides its fasteners under raised seams. That looks cleaner but adds installation complexity that's usually unnecessary on a shed-scale roof. Most residential shed projects use 29-gauge steel, a reasonable middle ground between thinner, flimsier panels and the heavier gauges built for large commercial structures.
Assess the Shed's Structure for Compatibility
A shed roof needs a minimum slope and adequate frame strength before it can carry metal panels safely. The minimum slope for lapped, nonsoldered-seam metal roofs without applied lap sealant is three units vertical in 12 units horizontal, or a 25-percent slope , per the International Residential Code's metal roof panel section. Some manufacturers allow lower slopes with added lap sealant, but 3:12 is the safe baseline for an exposed-fastener shed roof.
Beyond slope, check rafter spacing against the panel manufacturer's load chart. Most shed rafters spaced 16 to 24 inches on center handle lightweight metal panels without issue. Older or undersized framing may need sistered rafters first. If you're not sure your shed's frame qualifies, a quick roof inspection before you buy materials will save you from tearing into panels you've already cut.
Step-by-Step: How to Install Metal Roofing on a Shed
This is the core installation sequence. Follow the steps in order. Each one sets up the next, and skipping ahead is the most common cause of leaks later.
Measure the Roof and Calculate Materials
Measure each roof slope separately (length and width), then multiply to get square footage. Convert that number into roofing squares (one square equals 100 square feet) to order panels, underlayment, and trim in the right quantities.
Add 5 to 10 percent extra for waste, cutting mistakes, and eave overhang. Running short mid-install means a delay waiting on a special order, so round up rather than cutting it close.
Install Drip Edge Along the Eaves
Drip edge goes down first, before underlayment, along the eave to direct water past the fascia and into gutters instead of behind them.
- Fasten every 12 inches with roofing nails
- Overlap adjacent pieces by about 2 inches
- Keep the lower edge extending slightly past the fascia for clean runoff
Install the Roofing Underlayment
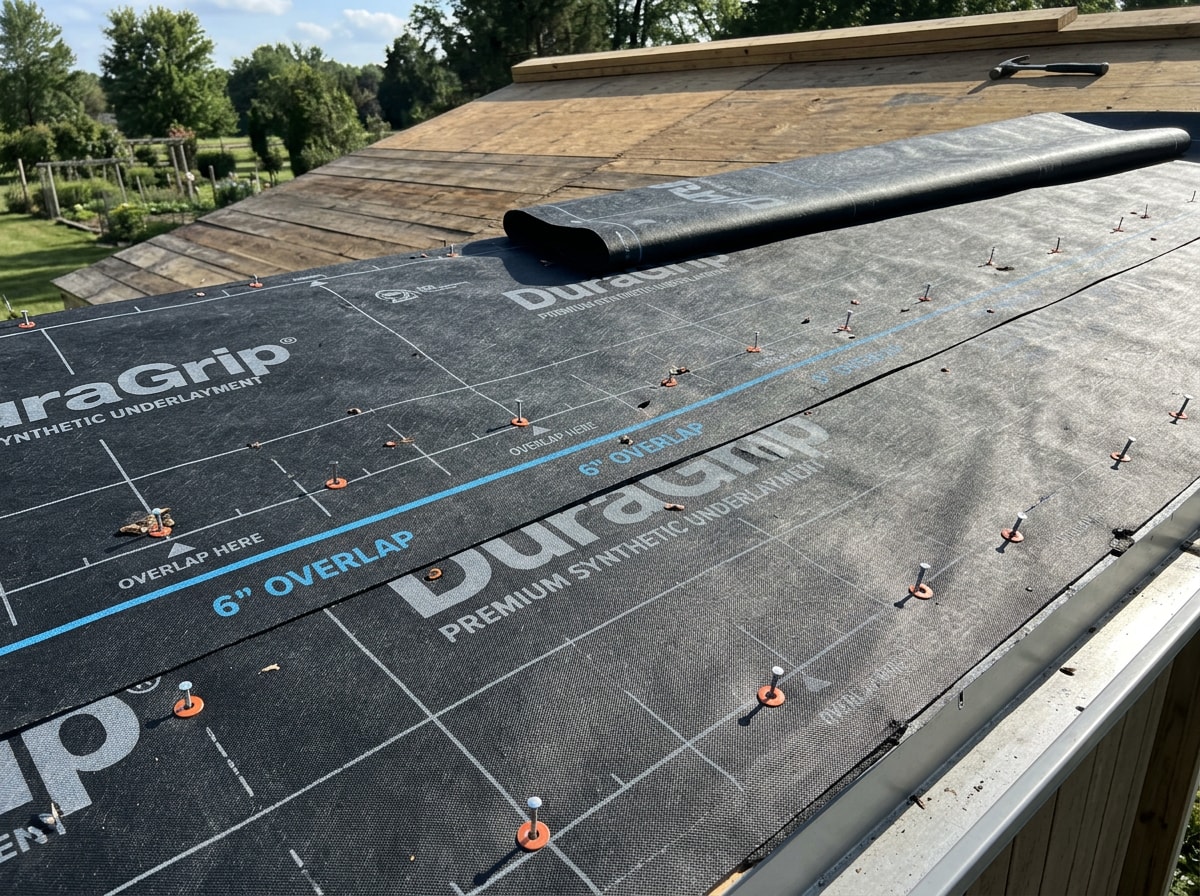
Underlayment is the moisture barrier between the panels and the roof deck. Run it from the eave toward the ridge, with each course overlapping the one below by 4 to 6 inches. Most installers now choose synthetic underlayment over felt specifically for metal roofs.
The reason comes down to heat and condensation. Metal panels conduct temperature swings faster than shingles. Felt can absorb that moisture and degrade under repeated cycling. Synthetic sheeting resists water absorption and holds up better under sustained heat.
On a solid plywood deck, this distinction matters even more, since trapped moisture has nowhere to escape compared to a purlin system that allows some airflow underneath. Ventilation helps provide fresh air, prevent condensation, and remove moisture from any enclosed structure with a metal roof, which is the same principle university extension programs cite for barns and other outbuildings.
Install Foam Closure Strips
Foam closure strips fill the gaps created by a panel's ribbed profile, blocking insects, wind-driven rain, and debris. Install an eave closure strip before the first panel goes down, and a ridge closure strip at the peak before the ridge cap is fastened.
Set and Fasten the First Panel
The first panel sets the alignment for the entire roof. Square it against the eave and gable edge with a chalk line before driving a single screw. Leave roughly 1 to 1.5 inches of overhang past the drip edge so water sheds clear of the fascia.
- Drive screws into the flat of the panel, never the raised rib
- Space fasteners every 12 inches along the overlap
- Space fasteners every 24 inches in the open field
Screws placed in the rib compress incorrectly under the washer. That's a leading cause of leaks on first-time installs.
Install Remaining Panels With Correct Overlap
Each subsequent panel overlaps the previous one by one full rib. Keep that overlap consistent panel to panel, checking alignment every two or three panels rather than waiting until the end.
- Run a strip of butyl tape along the sidelap before fastening to seal the seam itself, not just the exposed screw line
- Check squareness periodically against the eave as you work across the roof
- Small misalignments compound quickly over a long run of panels
Cut Panels to Length as Needed
Tin snips or aviation shears work well on lighter-gauge panels for straight cuts. For longer runs, a circular saw with a metal-cutting blade speeds things up. Always deburr cut edges afterward with a file or sanding block. Sharp burrs invite both rust and cuts.
Install the Ridge Cap
Center the ridge cap over the peak so it covers both slopes evenly. Set the outside closure strips in place before fastening the cap itself. Space fasteners roughly every 12 inches along both sides of the ridge, driving through the cap and closure strip into solid material beneath.
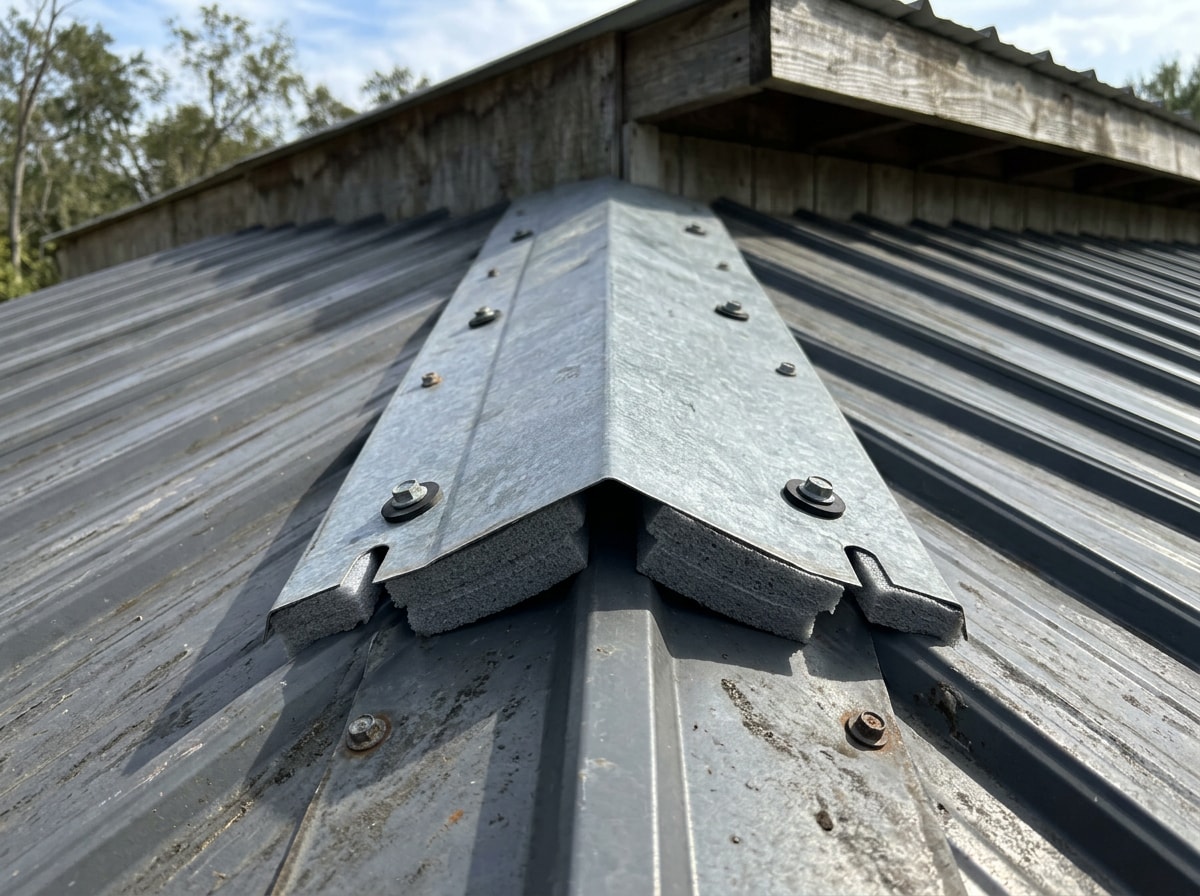
A poorly sealed ridge is one of the top causes of slow leaks that show up months after a roof is finished. It gets the most attention across installation guides for good reason.
Seal Penetrations and Inspect the Finished Roof
Apply roofing sealant around every fastener penetration that looks compromised, and around any vent or pipe boots cut into the panels. Finish with a walk of the entire roof, checking for proud screws, gaps in the ridge cap, and any panel edges that aren't flush before calling the job complete.
When to Call a Professional Instead
Most shed roofs are a manageable weekend project for a confident DIYer. Three situations change that math:
- The frame shows rot, sag, or undersized rafters that need structural correction first
- The shed sits above 200 square feet and needs a permitted inspection
- The roof slope is close to the 3:12 minimum, where sealing mistakes are least forgiving
Our crews across the Magic Valley see the same failure pattern on almost every shed re-roof call: screws driven into the rib instead of the flat, usually on a roof installed in a single rushed afternoon. If you'd rather skip that risk, get a free estimate and we'll handle material sourcing, fastening, and the final inspection walk for you.
Final Thoughts
A metal shed roof comes down to a handful of decisions done right: square the first panel, respect the overlap pattern, and choose underlayment suited to metal rather than asphalt shingles. Get those three things correct and the rest of the sequence falls into place.
A careful DIY installation today can mean decades without a callback. For help planning materials or a second opinion on your shed's frame, visit 208 Roofing Experts or contact us directly.
FAQ
Is Metal Roofing Suitable for All Types of Sheds?
Metal roofing works for most sheds, but suitability depends on roof slope and frame strength. A shed needs at least the minimum pitch for exposed-fastener panels and rafters capable of carrying the panel load. Sheds with very low-slope roofs or undersized framing may need modifications first.
What Do You Put Under Metal Roofing on a Shed?
Synthetic underlayment is the standard moisture barrier placed directly under metal panels, run from eave to ridge with overlapping seams. On a purlin system, airflow underneath helps manage condensation. A solid deck relies more heavily on the underlayment itself for protection.
Do You Screw Metal Roofing Into the Flat or the Rib?
Screws always go into the flat of the panel, never the rib. Driving fasteners into the flat allows the rubber washer to compress evenly and seal properly. Rib placement leaves gaps that lead to leaks over time.
What Is the Minimum Roof Slope for Metal Roofing on a Shed?
The code minimum for exposed-fastener metal panels without lap sealant is 3:12, or three inches of rise per 12 inches of horizontal run. Some manufacturers allow lower slopes with added sealant at every lap, but 3:12 is the safer target for a DIY shed roof.
How Much Does It Cost to Install Metal Roofing on a Shed?
Cost depends on panel profile, gauge, and roof size more than anything else. Corrugated exposed-fastener panels run cheaper per square foot than standing seam, and small shed jobs are usually priced per project rather than a strict per-square-foot rate. Getting a local quote is the only reliable way to budget, since supplier pricing shifts throughout the year.
Do I Need a Permit to Install a Metal Roof on a Shed in Twin Falls, ID?
Sheds over 200 square feet require a building permit in Twin Falls, while sheds under 200 square feet are generally allowed without one but still need to meet Planning and Zoning regulations. Re-roofing an existing, legally built shed usually doesn't trigger a new permit, but confirm current requirements with the Twin Falls Building Safety Department before starting work.